Sådan rettes iOS-videofejlen, der får enheden til at fryse
Der er en ny trojansk hest iOS-dræber, som kommer til din enhed i form af en harmløs video. Hvis du læser dette, har du sandsynligvis allerede været ramt af iOS-videofejlen. Du har muligvis klikket på en mp4-video over Safari, og din enhed er muligvis blevet langsommere over tid. Eller det kan endda have frosset, med dødens frygtede roterende hjul på din skærm, i gang i det uendelige.
Dette skyldes et ondsindet videolink, som har cirkuleret over internettet, åbning af videoen får din iOS-enhed til at fryse, hvilket generelt kræver en hård nulstilling, hvilket forårsager betydeligt datatab. Denne iOS-videofejl er den seneste i rækken af iOS-relaterede fejl og ‘crash pranks’, som kan forårsage en del uro. Der er dog ingen grund til at flippe ud endnu. Læs videre for at finde ud af, hvordan du løser iOS-videofejlen.

- Del 1: Sådan rettes iOS Video Bug gennem Hard Reset
- Del 2: Sådan rettes iOS Video Bug uden tab af data
- Del 3: Tips: Sådan undgår du iOS-videofejlen
Del 1: Sådan rettes iOS Video Bug gennem Hard Reset
A hard reset is a common method people use to fix most iOS errors, whether it is freezing, non-responsiveness, or whatever. As such, if you want to fix the iOS video bug, you can try this method.
Sådan rettes iOS Video Bug gennem Hard Reset:
1. Hold down the power button on the right side of the device.
2. Keep holding the power button and also press down on the lower volume button.
3. Continue holding both of them down until the Apple logo comes back on.

The hard reset should work to fix iOS video bug, however, if it doesn’t you might have to opt to activate the DFU mode.
Sådan rettes iOS Video Bug ved at aktivere DFU-tilstand:
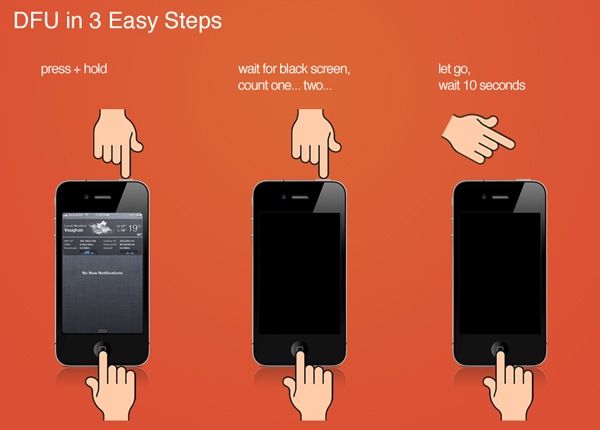
1. Turn iPhone off and connect it to the computer using a USB cord. Make sure the iTunes is on.
2. Hold tænd/sluk-knappen nede i 3 sekunder.
3. Hold down the lower volume button as well, as well as the power button.
4. Hold down both of them together for 10 seconds. However, it shouldn’t be so long that you see the Apple logo, the screen should remain blank.
5. Release the power button but continue holding down the lower volume button for 5 additional seconds. The screen should remain blank throughout.
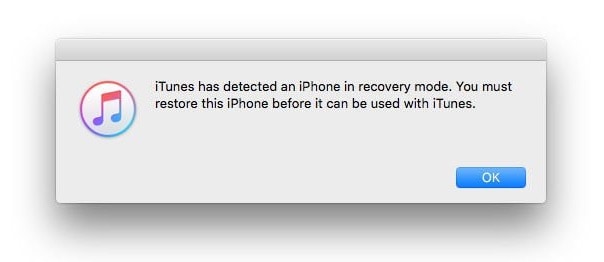
6. You’ll get a dialogue box informing you that the iPhone is in Recovery Mode.
7. På iTunes-skærmen skulle du se følgende meddelelse: ‘Hvis du oplever problemer med din iPhone, kan du gendanne dens oprindelige indstillinger ved at klikke på Gendan iPhone.’

8. You can thus restore your iPhone, or you can exit the DFU mode by pressing the lower volume button until the Apple logo comes on.
Denne metode bør helt sikkert rette iOS-videofejl, men du skal advares om, at brug af denne metode ville forårsage alvorligt datatab.
Del 2: Sådan rettes iOS Video Bug uden tab af data
Hvis du har nogle dyrebare data på din iOS-enhed, som du simpelthen ikke har råd til at miste, så ville det bedste bud for dig være at gøre brug af et tredjepartsværktøj ved navn DrFoneTool – Systemreparation (iOS). With this application, you can basically take care of any and every error that occurs in your iPhone, iPad, etc, without losing any of your precious data. You can check the box below for more information about the software.

DrFoneTool – Systemreparation (iOS)
Ret iOS-videofejl uden tab af data
- Hurtigt, nemt og pålideligt.
- Løs med forskellige iOS-systemproblemer som gendannelsestilstand, hvidt Apple-logo, sort skærm, looping ved start osv.
- Retter andre iTunes-fejl, iPhone-fejl og mere.
- Virker til alle modeller af iPhone, iPad og iPod touch.
Of course, the process isn’t as cut and dry as that of a Hard Reset, but the little extra effort is completely worth it in order to preserve all your precious data, wouldn’t you agree? So read on to find how to fix iOS video bug without suffering data loss, using DrFoneTool – iOS System Recovery.
How to fix iOS Video Bug using DrFoneTool – System Repair (iOS)
Trin 1: Vælg ‘Systemreparation’
After you launch the application, go to ‘More Tools’ on the left-hand panel. Following that, select ‘System Repair’.
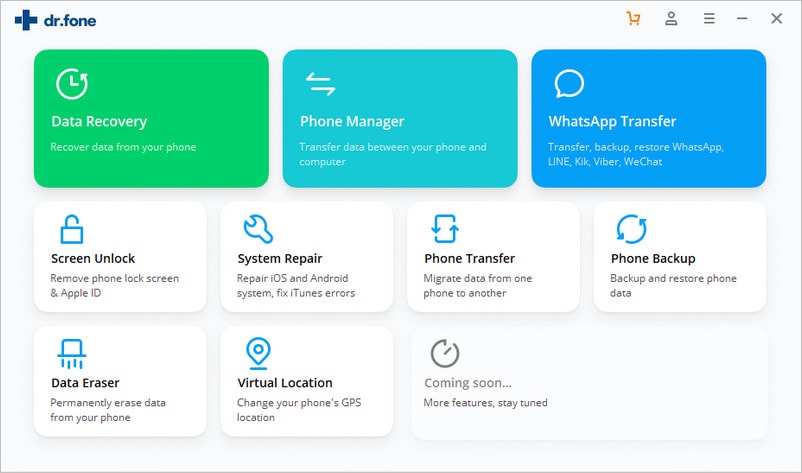
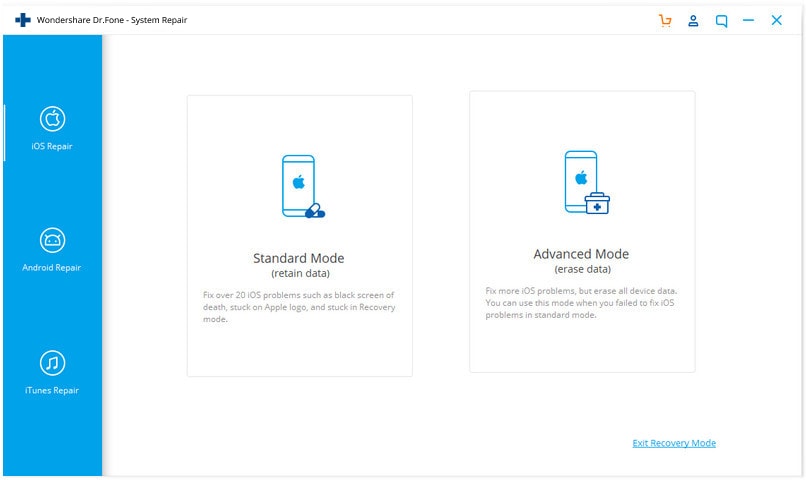
Tilslut din iOS-enhed til computeren ved hjælp af en USB-ledning, og vælg ‘Standard Mode’ på applikationen.
Trin 2: Download firmware
DrFoneTool vil automatisk finde din iOS-enhed og tilbyde dig den nyeste firmware til download. Alt du skal gøre er at klikke på ‘Start’ og vente.
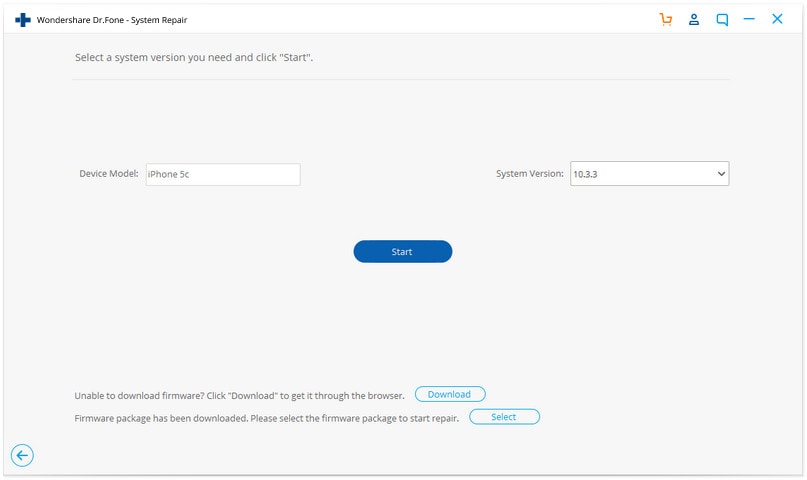
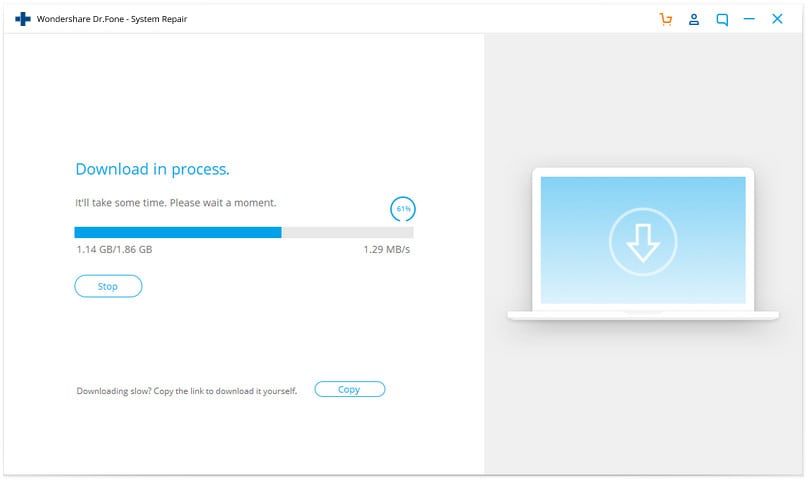
It will start to download the firmware package and may take some time.
Trin 3: Fix iOS Video Bug
Så snart overførslen er færdig, skal du klikke på ‘Ret nu’, og DrFoneTool vil straks begynde at reparere din iOS-enhed.
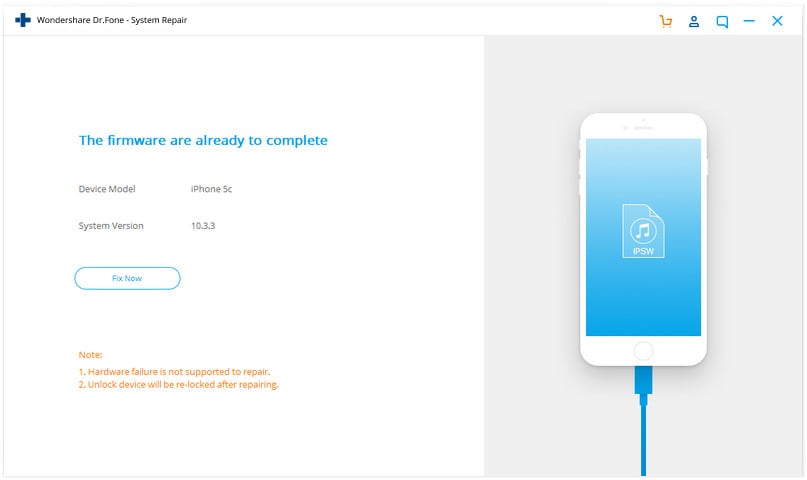
After a few minutes, your device would restart to normal mode. The whole process would have taken about 10 minutes.
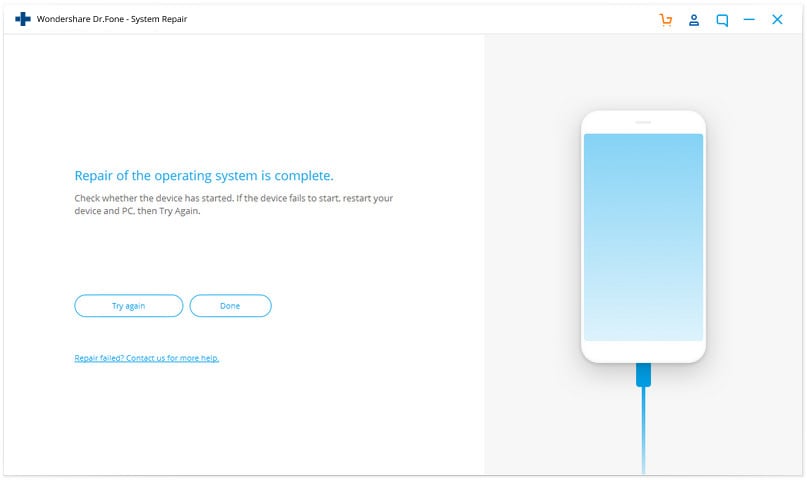
Og med det har du effektivt knust iOS-videofejlen, uden at have lidt datatab overhovedet.
Del 3: Tips: Sådan undgår du iOS-videofejlen
Here’s a couple of precautions you can take to avoid contracting the iOS video bug.
1. Such ‘crash pranks’ come and go. This is because Apple keeps updating its software so as to protect your device from these issues. As such, you should keep your iOS device updated.
2. Få ikke adgang til videoer, hvis de er blevet sendt af kilder, du ikke har tillid til, eller hvis de er blevet sendt anonymt.
3. Increase your Privacy settings, by going to the ‘Privacy’ tab in the Settings app.
You know what they say, prevention is better than cure. As such, you should take the precautionary methods to avoid contracting the iOS video bug phenomenon. However, if you are unfortunate enough to get it, you can effectively fix iOS video bug using any one of the techniques we’ve mentioned. All of them – the Hard Reset, DFU Recover, and DrFoneTool – are great methods, all of which would fix your iOS device. However, if you are concerned about data loss, you should use DrFoneTool – iOS System Recovery as it has the least chance of data loss amongst all the alternatives.
So I hope these work for you and do let us know which technique you went with and if it succeeded in fixing the iOS Video Bug. We’d love to hear your voice!
Seneste Artikler

