How to Export Notes from iPhone to PC/Mac Easily
‘I have lots of notes on my iPhone and I don’t know how to export my notes from iPhone to PC. Any suggestions?’
Sure, you are lucky to come here. In this article, we are going to share an easy way to export iPhone notes to PC/Mac. And most importantly, we will clarify some wrong methods about iPhone notes export.
- Part 1: Is it possible export notes from iPhone to PC/Mac via iTunes?
- Part 2: Is it possible to export iPhone notes to PC via iCloud?
- Part 3: Simple way to selectively export notes from iPhone to PC/Mac
Part 1: Is it possible export notes from iPhone to PC/Mac via iTunes?
Όταν πρόκειται για την iPhone data backup, sync or export, we may take it for granted that iTunes can do all of that for us. But actually, iTunes is not that perfect. And iTunes certainly can’t export notes. You can check the steps below.
Step 1: Launch iTunes and connect your iPhone to the computer.
Step 2: Click the iPhone icon in the upper-left corner of the iTunes window. Then you can see a list of contents that you can sync in the blow of ‘Settings’. But notes is not included in the list. You can only click the listed data types to sync and then export to your computer. So we can’t use iTunes to export notes from iPhone to computer.


Well, is there any other method to export iPhone notes to computer? Let’s keep reading.
Part 2: Is it possible to export iPhone notes to PC via iCloud?
Strictly speaking, we can’t use iCloud to export notes from iPhone to PC. But iCloud backup is still useful since you can save iPhone notes on cloud. In that way they can be accessed anywhere, anytime. Below is the way to use iCloud to transfer the notes from your iPhone to cloud. But it is just transfer to your iCloud. You can only read it by entering https://www.icloud.com/ on your browser. It is not export your iPhone notes to your computer.
Steps to export notes from iPhone to PC/Mac via iCould
1. Click on the settings option and go to ‘iCloud’.
2. Login with the iCloud login details and enable the iCloud option.
3. After the ‘Notes’ option has been enabled, click on ‘Notes’ and set ‘iCloud’ as the default medium for transferring purposes.
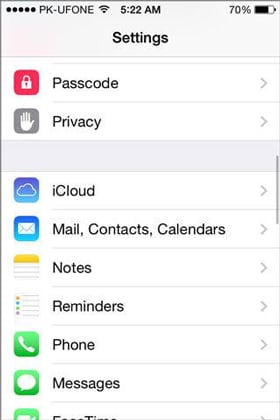


4. Thus all of your notes will be automatically uploaded to the cloud. The notes can be accessed from the internet by entering the iCloud logging details.
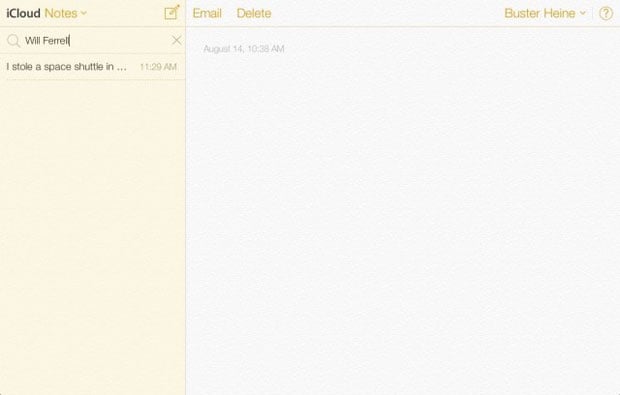
Σημείωση: After you login iCloud.com, you can read your iPhone notes on your computer, but you can’t save it to your computer. We tried to save some notes as HTML files on computer and log out of iCloud.com. But when we open these files again, it can’t show contents of your notes normally. So, we can just backup/sync our notes with iCloud and read them on your browser. Strictly, we can’t export iPhone notes to our computer via iCloud. So it is actually impossible to export iPhone notes with Apple’s product. Confronted this problem, we’d like to introduce you a friendly tool to export your iPhone notes to your computer.
Part 3: Simple way to selectively export notes from iPhone to PC/Mac
DrFoneTool – Δημιουργία αντιγράφων ασφαλείας και επαναφορά (iOS) is a wonderful software which can be used for backup and export your iPhone notes, text messages, contacts, photos, Facebook messages and many other data to your PC or Mac.

DrFoneTool – Δημιουργία αντιγράφων ασφαλείας και επαναφορά (iOS)
Backup and export your iPhone notes in 1 click!
- Ένα κλικ για να δημιουργήσετε αντίγραφα ασφαλείας ολόκληρης της συσκευής iOS στον υπολογιστή σας.
- Supports to backup Social apps on iOS devices, such as WhatsApp, LINE, Kik, Viber.
- Allows to preview and restore any item from the backup to a device.
- Exports what you want from the backup to your computer.
- Καμία απώλεια δεδομένων στις συσκευές κατά την επαναφορά.
- Επιλεκτικά δημιουργήστε αντίγραφα ασφαλείας και επαναφέρετε όσα δεδομένα θέλετε.
- Supports iPhone X/87/SE/6/6 Plus/6s/6s Plus/5s/5c/5/4/4s that run any iOS versions.
- Πλήρως συμβατό με Windows 10 ή Mac 10.8-10.14.
You can export notes from iPhone to PC and mac by using the following steps:
Step 1: Connecting your device
After you have installed DrFoneTool on your computer, launch it. Then choose ‘Backup & Restore’ from the interface. Connect the USB cable with iPhone and desktop and wait for DrFoneTool to detect your device.

Step 2: Select Files to Backup
Once your iPhone is successfully connected, click on Backup and DrFoneTool will automatically present the supported file types. You can select all of those by clicking on the boxes next to the items, or you can select everything including call logs, photos and videos, contacts, messages, etc. To export notes from iPhone to your Mac or PC, you can only check ‘Notes & Attachments’. Then press ‘Backup’ after you have completed choosing.
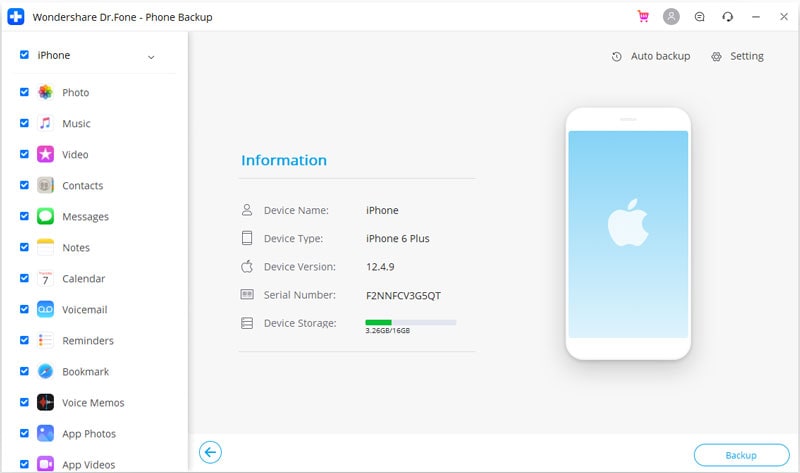
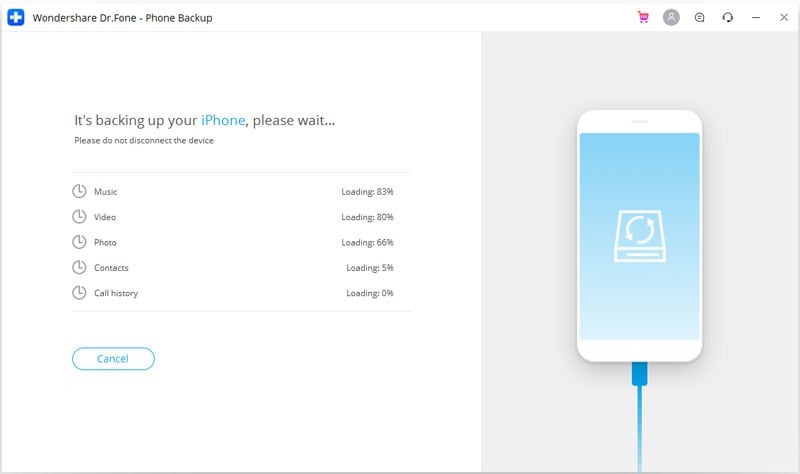
The time taken to complete the backup process is determined by the size of data you have chosen. It usually gets over within a few minutes.
Step 3: View Backup Content
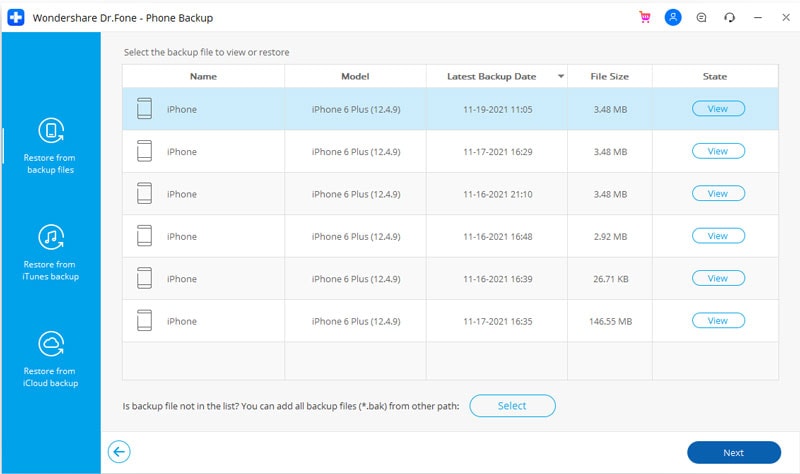
Once the backup completes, click on View Backup History and you will see all the backup files on your computer. Click on the latest backup file and hit on View, you can check all content in this backup.
Step 4: Export iPhone notes to PC or Mac
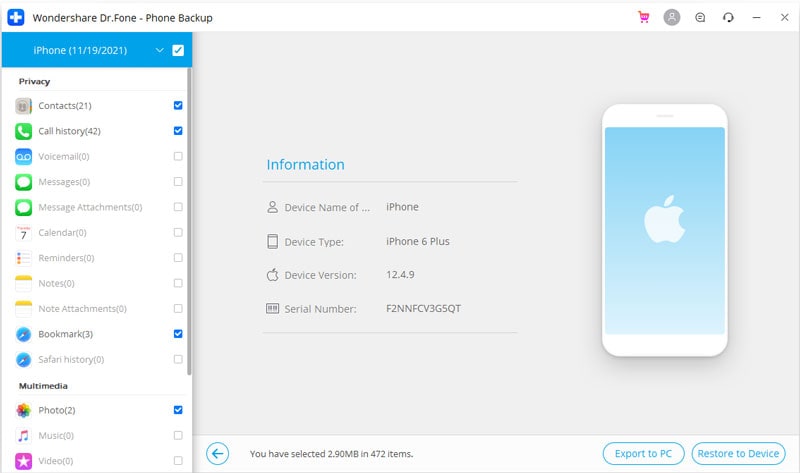
To export notes to the PC, click on the ‘Export to PC’ option. You can choose individual types or export whole of it. The save path can be specified by using the pop-up window. To take print outs, click on the print icon at the top of the screen.
πρόσφατα άρθρα

