Backup iPhone 13 Videos
Are you in habit of making videos of every important day in your life? If yes, then you minght want to backup iPhone 13 videos so that you can svae them at safe place.
Whether you want to update your iPhone or someone has stolen it, always have a backup. Or sometimes, when you don’t have enough space in your iPhone, just get a backup and then delete the data from a phone.
Your iPhone data is sometimes crucial, so it is necessary to have a backup to ensure data integrity. Moreover, a backup of iphone 13 videos helps you save important media at safest palce. Whenever you replace or update the iOS device, you can use backup to access the desired videos.
Backing up the iPhone 13 is a mundane task, but there are different ways to take backups.
Let us take a look!
Part 1: Why Is iPhone 13 Videos Backup Important?
iPhone13 Videos backup is essential to save your time and energy. Even if you keep all files in iCloud or Dropbox, it is frustrating. It takes hours to download video files and access them.
It will destroy your productivity.
This is where the backup of iPhone videos come handy. The following are some reasons for iPhone 13 backup:
盗難
Most people keep important and personal videos on their phones. If by chance, you lose it or someone steals your device, it will be bothersome.
ハードウェア障害
This type of failure is quite common. Every phone has got a standard life, and it can end without giving a signal. So you might lose your videos if there is any hardware failure.
Malicious Attack
Your devices are not safe from all types of software attacks. Some malicious attacks can damage the OS or its functionalities. So, you will have to install the new OS necessarily. As a result, you will lose some personal videos from your iPhone.
Mistaken Data Loss
No one is perfect, so it is pretty common to make mistakes such as deleting critical videos. So, you can overcome this problem by phone backups.
迅速な回復
The best part of backup is that you can quickly recover videos in any case of failure.
Part 2: 3 Ways to Store iPhone 13 Videos
When you use iPhone 13, it is better to store videos carefully. Here are some of the useful ways to store iPhone 13 vdeos.
方法1:使用する iCloud for Storing iPhone 13 videos
The easy way to store iPhone13 Videos is to keep them on iCloud. It is the best option to back up if you do not have a PC or Mac. To do so, follow the steps described below:
ステップ1: On your iPhone, go to the ‘Settings’ option. Then, press on your name.
ステップ2: Tap on ‘iCloud.’ After that, click on the ‘iCloud Backup’ option in the list towards the bottom.

ステップ3: Turn on the iCloud backup by clicking the button next to it.
ステップ4: Let your iPhone store files on its own. If not, you can perform backup manually to iCloud by clicking on the ‘Back Up Now’ option.
Always make sure to connect your device with Wi-Fi and a power source before starting the backup.
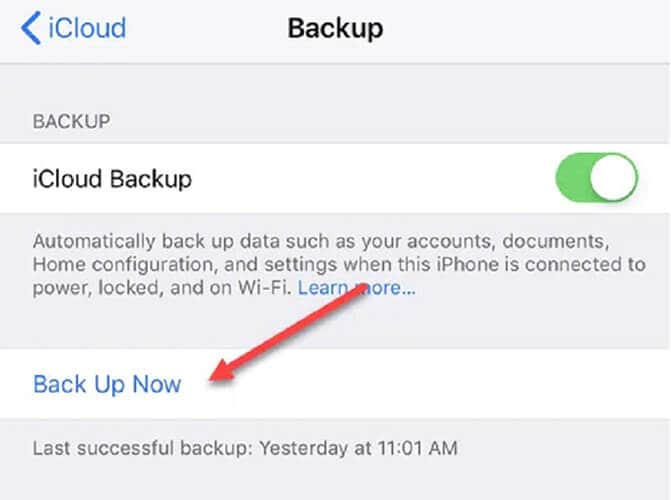
It will help you backup videos automatically when your iPhone 13 is locked, getting charged, connected to the Wi-Fi network. iCloud backups are a good option because they happen themselves without any assistance.
Moreover, it ensures up-to-date backups.Whenever you sign in to an iOS device with the iCloud account, you will see a pop-up to restore from the backup.
欠点: the drawback of Cloud is that you can only store limited videos for free. After some limit you need to pay for extra storage.
Way 2: Store Videos on iCloud Photo Library
You can also try iCloud Photo Library to Store iPhone 13 Videos. If you made videos from your iPhone 13, then it is worth using the iCloud Photo Library.
To do so, follow the steps mentioned below:
ステップ1: First, enable the iCloud Photo Library. For that, go to the settings on your iPhone 13. Then, tap on your name.
ステップ2: Now, click on the ‘Photos’ and turn it on.

ステップ3: Check the ‘Optimize iPhone Storage’ option unless you have enough space on the iPhone for storing all the media.
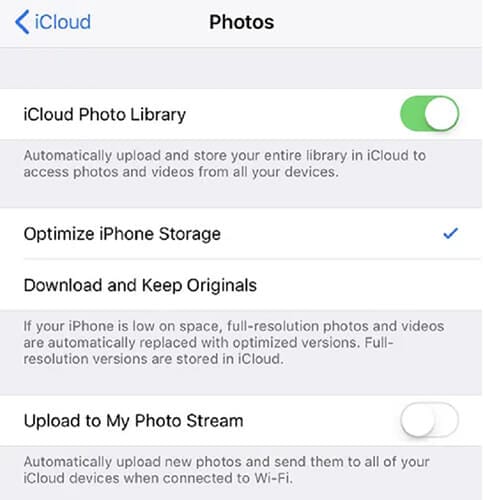
Whenever you use your iCloud ID on any device, you can see the backup videos. Again it offers you limited free space, which means you can not store all videis in it.
方法3: Google Photos/Cloud Storage
One of the most used methods to store iPhone13 videos is to backup to Google Photos. Download Google Photos on your device and have your videos or photos automatically uploaded.
To use this method, follow the below-described steps:

ステップ1: Go to Google Photos and click on three horizontal lines.
ステップ2: Tap on the gear icon. Then, click on the ‘Backup & Sync’ option and turn it on. It will instantly begin syncing everything in the iCloud Photo Library to the ‘Google Photos.’
If you already have enough media in the photo library, Google Photos will automatically sync the entire library.
It will force the device to download all the content again from iCloud. As a result, the device will not have much space until the completion of the upload.
The main reason for choosing Google Photos backup is that it links to Google Drive. By using Google Drive, you can easily sync the entire photo library to other systems.
欠点: Google photos also charge you after you occupy free space to store iPhone 13 videos.
Part 3: Transfer or Backup iPhone 13 Videos with DrFoneTool-Phone Manager (iOS)
DrFoneTool –電話マネージャー(iOS) is one of the most time-saving and easiest ways to transfer or backup iPhone 13 Videos. It is a reliable and secure device management app that can help you backup important files between your iPhone13 and PC.
This tool is compatible with the leading iOS version. In addition, it has a desktop application for both Windows and MAC. Therefore, it provides a secure medium to transfer the videos in a user-friendly way.
The following are steps describing the video transfer from iPhone to PC using DrFoneTool – Phone Manager (iOS):
ステップ1: Download the DrFoneTool tool on your systen and Install it.
ステップ2: Launch Dr. Fone Toolkit on the PC and choose the ‘Phone Manager’ module.

ステップ3: Connect your iPhone13 with your computer or PC. DrFoneTool will detect the device automatically and provide you following options:
- iTunesにデバイスメディアを転送する
- iTunesメディアをデバイスに転送する
- PCへのデバイス写真の転送
ステップ4: From the navigation bar, go to the ‘Videos’ tab. You will be able to view the saved videos on the iPhone 13. You can also see them divided into different categories from the left panel.
ステップ5: Select the videos that you want to transfer from the system to iPhone 13. Then, go to the ‘Export’ option on the toolbar.
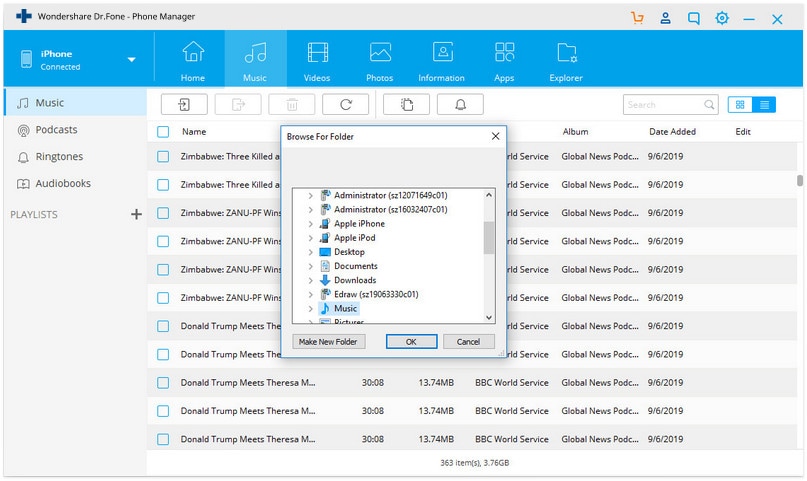
ステップ6: Export the selected files to the system or iTunes from here. To move the video from iPhone 13 to the computer, select the ‘Export to PC’ option and choose the save path to store the videos on the PC.
Within few seconds, learn to transfer videos from iPhone 13 to a system via DrFoneTool – Phone Manager (iOS). Then, visit the destination folder and make necessary changes or copy the data.
Part 4: How to Backup iPhone 13 Videos using Mac
ステップ1: Connect your iPhone 13 and Mac system with a cable.
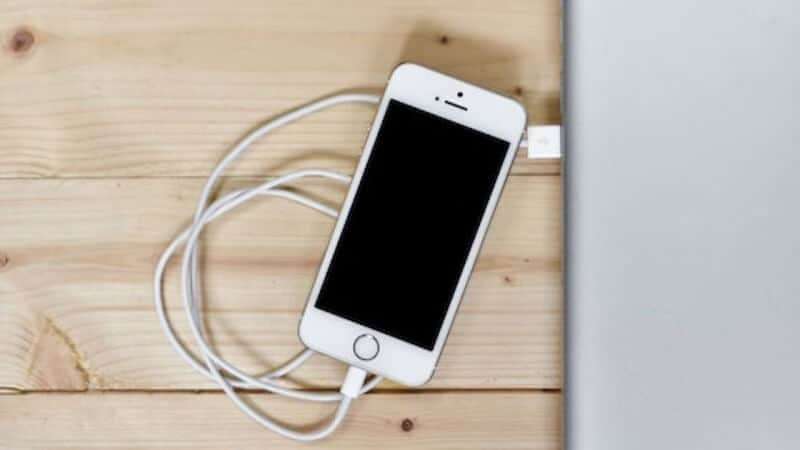
ステップ2: On your Mac system, select your iPhone13 in the Finder sidebar.
When you want to use Finder to backup your iPhone13, you need macOS 10.15 or later. If you need to use earlier versions of macOS to back up the iPhone13, use “iTunes.”
ステップ3: Click “General” at the top of the Finder window.

ステップ4: 「iPhone上のすべてのデータをこのMacにバックアップする」を選択します。
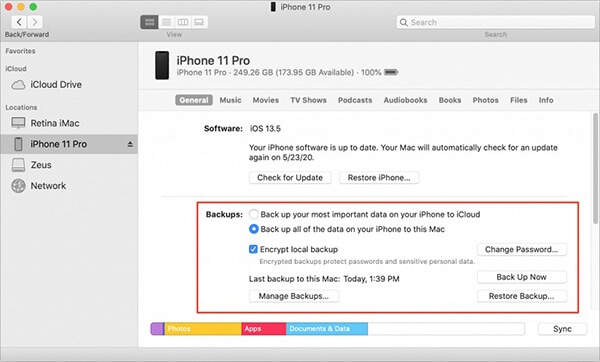
ステップ5: Select the “Encrypt local backup” to protect the backup data with a password and to encrypt it.

ステップ6: Click on the “Back Up Now.”
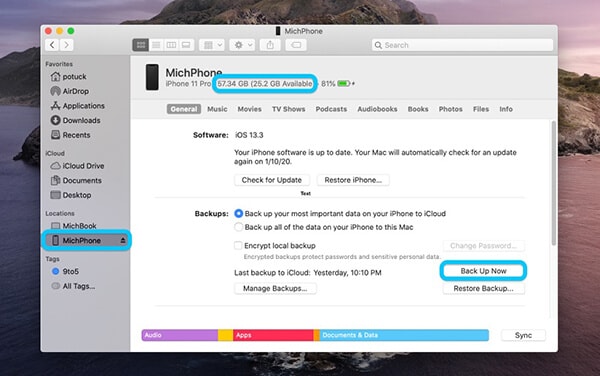
注意: You can also connect your iPhone 13 to the Mac system wirelessly if you set up Wi-Fi syncing.
ステップ7: To check status, look in the sidebar.
You will see the confirmation about the iPhone 13 backup when it’s complete.
ステップ8: Click on the “Eject” button next to your iPhone and unplug it.
結論
iOS latest versions will give you a great experience on your iPhone 13. But you must understand the importance of data backup and its various ways.
So, create a backup of your iPhone 13 with the methods described above. In this way, you do not have to worry about video loss or software malfunction. DrFoneTool-Phone Manager(iOS) will give you a great experience and help you with video backup.
Moreover, it is one of the best iPhone 13 to computer transfer software and helps you protect your device safely. So, download this application now and enjoy its features.
最後の記事