The Way to Transfer Pics from iPhone to Laptop
It is not strange to see people transferring photos and other files between computers and smartphones. iPhones are a bit more complicated than Android phones when it comes to sharing photos. This is why it is important to learn how to transfer pics from iPhone to laptop.
If you have been in a dilemma as to how to transfer your photos before now, let’s help you end it. We put this post together to help you solve this problem. Let’s dive straight in.
Transfer iPhone pics to laptop
The iPhone camera has a reputation for being very sharp and efficient. With the quality of pictures you take with your iPhone, soon your phone storage will be full. What do you do when you are out of storage space? Of course, transfer files to your computer.
One such category of files to transfer are the photos on your iPhone. Asides storage issues, there are many other reasons why you need to move photos to your computer. They include:
- Searching for privacy.
- Creating backup.
- Editing on a larger screen.
Whatever your reason may be, understanding the transfer process is important. In this post, we will look at three ways you can transfer pics from iPhone to laptop. They are:
- Transfer pics from iPhone to laptop at once
- Download pics from iPhone to laptop with iTunes
- Send pics from iPhone to laptop through iCloud
Follow the steps under each of these sections to transfer your photos without stress. Are you ready? Continue reading.
Part One: Transfer pics from iPhone to laptop at once
For many people, this is the easiest way of moving photos to a computer from an iPhone. To be sincere, there are a couple of ways of achieving this. However, we will look at the easiest of them all for your convenience.
What is it? Transferring your photos to your computer from iPhone using a file manager.
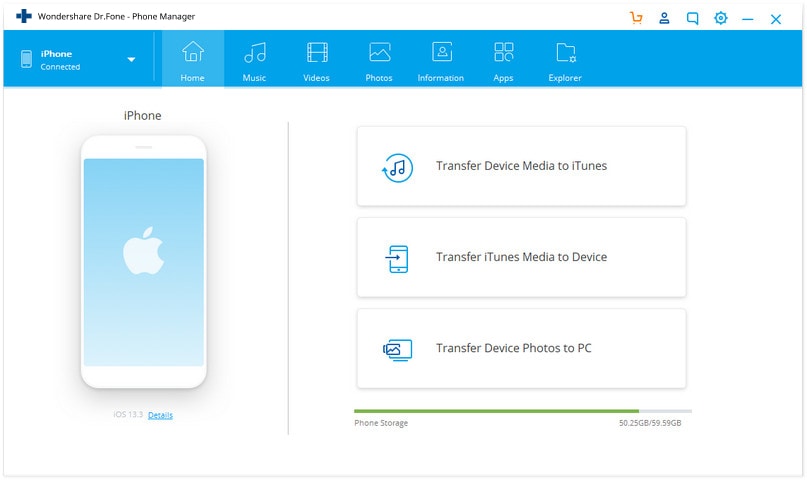
Is it as easy as it sounds? Yes, it is. For this guide, we will be using DrFoneTool Phone Manager as our case study. This convenient tool kit allows you to move files to your computer from your iPhone with ease. You enjoy such luxury because of the presence of several tools present on the software.
Before we go ahead, here’s a little detail about DrFoneTool. This app allows you to transfer, backup, and manage your files. So how do you use it to transfer pics from iPhone to laptop at once?
Your answer lies in the steps below:
Stap 1 – You need to download DrFoneTool if you don’t have it on your computer already. Download it using this link.

Stap 2 – Connect your iPhone then select “Phone Manager” on the app interface.

Stap 3 – Another window appears presenting you with a list of options. Click “Transfer Device Photos to PC.” This makes it possible to save the photos on your iPhone to your computer.
Stap 4 – Choose the photos you need to move to your computer. Go to the main page on the app and open the “Photos” tab. This presents to you all the photos available on your iPhone. You can choose from here the ones you need to move to your laptop.
Stap 5 – Click “Export to PC” when you are done choosing the photos. When you do, a dialog box opens asking you to choose the destination folder. Simply pick a folder or create one and click “OK.”
With these simple steps, you have successfully transferred pics from iPhone to a computer at once. Congratulations!!!
Let’s see another way of moving your photos to your computer via your iPhone below.
Part Two: Download pics from iPhone to laptop with iTunes
Without a doubt, one of the best ways to sync your iPhone with a computer is through iTunes. Even though the process is quite easy, many people feel there are certainly stressing disadvantages. One such disadvantage is data syncing.
Let’s explain the data syncing issue before we go on. When you use iTunes to import photos or any other files, there is a possibility of data loss. This means you may lose photos, music, iBooks, ringtones, and TV shows.
Notwithstanding, using iTunes is the default method of moving photos to your computer from the iPhone. If you are ready to accept the flaws, follow these steps to transfer iPhone pics to laptop using iTunes.
Stap 1 – Plug your iPhone to your computer using a USB cord. iTunes should run by default but if it doesn’t, you need to open it manually.
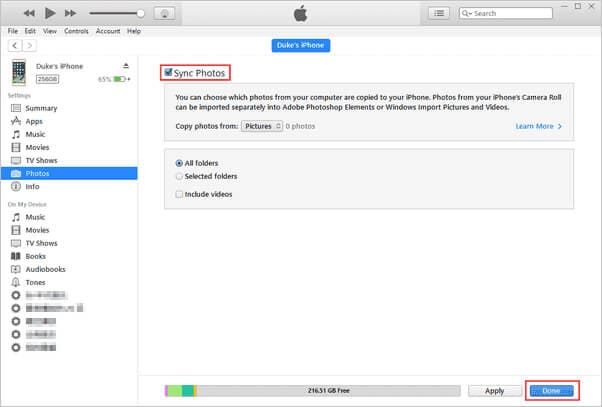
Stap 2 – Click on the “Device” tab. Then choose “Photos.”
Stap 3 – Click “Sync Photos.” This allows you to choose the pictures you need to transfer using the “Copy Photos From” option.

Stap 4 – Click on the “Apply” button. This begins the syncing process so that the photos on your iPhone appear on the computer.
That’s all about transferring photos from iPhone to a laptop using iTunes. However, there is a catch. This method only works if iCloud Photos is not enabled on the iPhone. What does this imply? If iCloud is enabled on your device, disable it before you begin the process.
Part Three: Send pics from iPhone to laptop through iCloud
For many people who have iCloud Photos enabled, this is a favorable and easy process. Why shouldn’t it? It is very convenient when you have less than 5GB worth of photos in your library. iCloud makes transferring files very easy and quick.
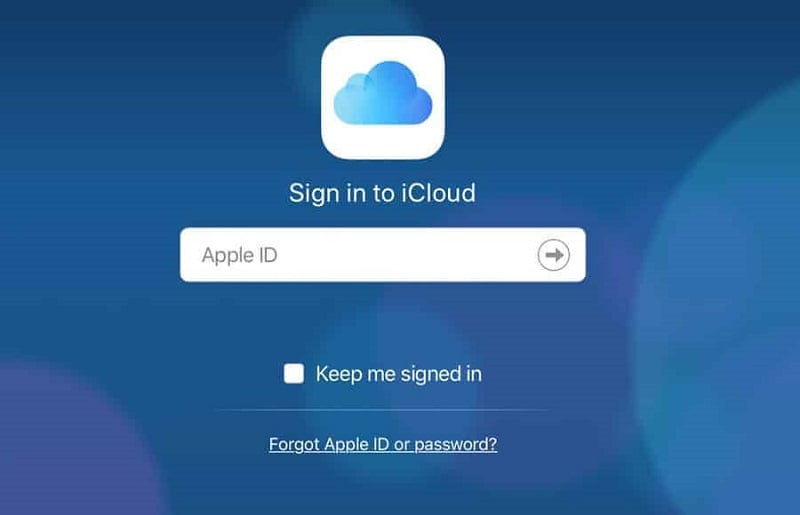
The first thing to do is to set up your devices with iCloud. Once you do, each picture you take uploads to iCloud Photos by default. This step synchronizes all your i-devices like iPads, iPhones, Macs, iPad touch, and Apple television.

So the secret is setting up iCloud on your phone and Mac PC. You should also sign in using similar Apple IDs on each device. Here’s how to set up iCloud on the iPhone:
Stap 1 – Bezoek Instellingen.
Stap 2 – Tap your name located at the top of your screen.
Stap 3 – Tap on “iCloud.”
Stap 4 – Beneath the storage indicator, there is a list of all the apps able to use iCloud.
Stap 5 – Select “Photos.”
Stap 6 – Switch the “iCloud Photo Library” on.
That’s all you need to do to set up iCloud on your mobile device. Now, let’s see how to set iCloud up on your computer.
Stap 1 – Klik op Systeemvoorkeuren.
Stap 2 – Selecteer iCloud.
Stap 3 – You’ll see a button beside “Photos.” Click on this button to get a series of options.
Stap 4 – Select “iCloud Photos.”
Voila!!! Now you have iCloud set up on both devices.
Remember to sign in using similar Apple IDs so that your media can sync by default. This sync occurs as long as your iCloud is enabled on both devices.
There’s something you should be wary of. You cannot sync your photos on iCloud Photos and iTunes simultaneously. If you enable iCloud while already syncing with iTunes, you will get an error message.
This message will be something like “Photos and Videos Synced from iTunes will be Removed.” We had mentioned this earlier, though not this elaborate.
Anyway, once you have iCloud enabled on your computer, you shouldn’t have a problem. All your photos and even videos will sync by default without extra effort. This means you can access each photo on your Mac and work on them from there.
What else is there to know about how to transfer pics from iPhone to laptop using iCloud? The beautiful thing with this process is that you can make changes to the pictures on either platform. When you do, the changes reflect by default on the other device. Isn’t this amazing?
However, you should note that if you decided to delete the photos from either device, you should turn off iCloud. If you don’t, you lose the photo on both devices.
As you know, you have a 5GB limit with iCloud. This means it is wise to move your photos from iCloud Photos on your computer to another folder. With this step, you don’t overload your storage and you can keep recycling.
If you are very convenient with iCloud storage, you can upgrade to the paid version. This costs about $0.99 every month for 50GB and $9.99 every month for 2TB. That’s not too costly if you need a lot of space.
Conclusie
All the steps we have discussed above are efficient and very effective. Still in a fix about how to download pics from iPhone to laptop? There are so many third-party apps that you can use such as Google Photos, Dropbox, CopyTrans, to mention a few.
It is important to move photos once in a while to clear up space on your iPhone. The method of your choice depends on what OS your computer runs on. It also depends on the frequency of transfers and, most of all, your familiarity with the process.
Now you know how to transfer pics from iPhone to laptop. Do you have any questions or did we leave anything out? Share with us in the comments section.
Laatste artikels


