How to Upload iPhone/iPod/iPad Music to Google Music
Android being an open source technology is gaining more importance with every passing day. The user demand curve is clearly shifting towards this technology and when it comes to present situation the users of android are far more in number as compared to iOS which shows the popularity as well as the user engagement in this regard. This has forced both Google and Apple Inc. to develop intra platform software for file and data sharing her türlü.
Most of the users want to transfer music files and entertainment media from one device to another and for the same reason it is to be noted that this tutorial teaches all such users to do the needful in the best manner so that they can use both the technologies side by side. It is also to be noted that the users who use both Android and iOS phones are also increasing in number and for the same reason it the developments in this regard is the need of the hour for both platforms so that the users can continue to enjoy the best services as well as quench their thirst of both iOS and android.
Bölüm 1. iPhone/iPod/iPad Müziğini iTunes ile Eşzamanlayın ve Ardından Google Müzik’e Yükleyin
This is a two-part process through which a user needs to follow to make sure that the content is transferred to the appropriate platform without any issue. Firstly, the user needs to sync the iDevice with the iTunes and then sync the iTunes with the Google music. Following is a process that is to be followed:
1. iPhone’unuzu USB kablosuyla PC’ye bağlayın.
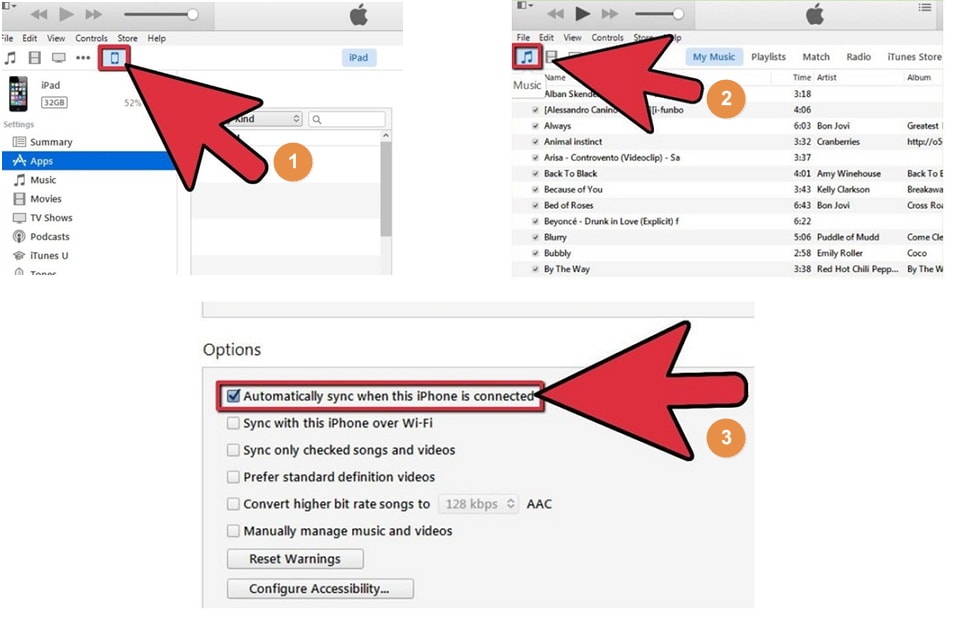
2. iTunes’u başlatın ve cihaz icon at the top-left corner in iTunes.
3. seçmek Music or other media type from the left sidebar which you want to sync.
4. Within the iTunes options, the user also needs to make sure that the relevant option highlighted is selected. This window pops up as soon as the syncing starts. Choosing this option and pressing OK will make sure that the first part of the process completes.
5. The user has to visit müzik.google.com to make sure that the Google music application for the computer is downloaded.
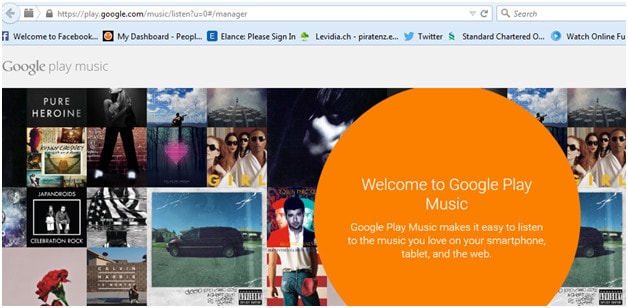
6. The user needs to follow the prompts and accept the terms and conditions to make sure that the application is downloaded successfully. Then launch it.
7. Once it has been done, the user needs to make sure that the option of “Automatically upload songs added to iTunes” is checked so that the music that was synced with iTunes in the first part is then synced with the Google music.

8. The user now needs to download Google Play Music from the Google Play Store.

9. Once the application is downloaded to the Android handset, the user needs to tap it so that it opens. The option of “All Music” is to be selected from the drop down menu and the option of ‘My Library” is to be selected from the left panel. This will make sure that all the music synced with Google Music appears.
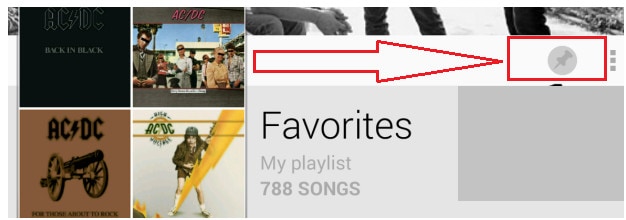
10 The playlist or the music that is to be kept on the device can be managed by clicking the relevant icon on the top right corner of it and this completes the process in full. If the user wants to stream the music then there is no need of keeping the playlist on the device but if the user wants to make sure that the music is also enjoyed on the go as well as offline then this option should be followed for sure:
Part 2. Transfer Music Directly on iPod/iPad/iPhone to Android Device with DrFoneTool – Phone Manager (iOS)
There are no words to describe the awesomeness of DrFoneTool – Phone Manager (iOS), the software that has been developed by Wondershare to make sure that the different functionalities are carried out between different platforms. It not only helps the iOS users but also the android users to make sure that the best is done with them in terms of file and data sharing, but they also enjoy the software platforms that have been built by the respective companies. It is a great connecting software program and for the same reason it is ranked high by the users which shows its popularity and care about the customers. Following is the process which also answers the question in the heading.

DrFoneTool – Telefon Yöneticisi (iOS)
Transfer Music from iPhone to Android without iTunes
- Müziğinizi, fotoğraflarınızı, videolarınızı, kişilerinizi, SMS’lerinizi, Uygulamalarınızı vb. aktarın, yönetin, dışa aktarın/içe aktarın.
- Müziklerinizi, fotoğraflarınızı, videolarınızı, kişilerinizi, SMS’lerinizi, Uygulamalarınızı vb. bilgisayara yedekleyin ve kolayca geri yükleyin.
- Bir akıllı telefondan diğerine müzik, fotoğraf, video, kişi, mesaj vb. aktarın.
- Medya dosyalarını iOS aygıtları ve iTunes arasında aktarın.
- iOS 7, iOS 8, iOS 9, iOS 10, iOS 11 ve iPod ile tam uyumludur.
1. Adım Download, install and launch DrFoneTool on your computer and select ‘Phone Manager’ from all the functions. Then connect the iPhone/iPad to the computer using an USB cable.
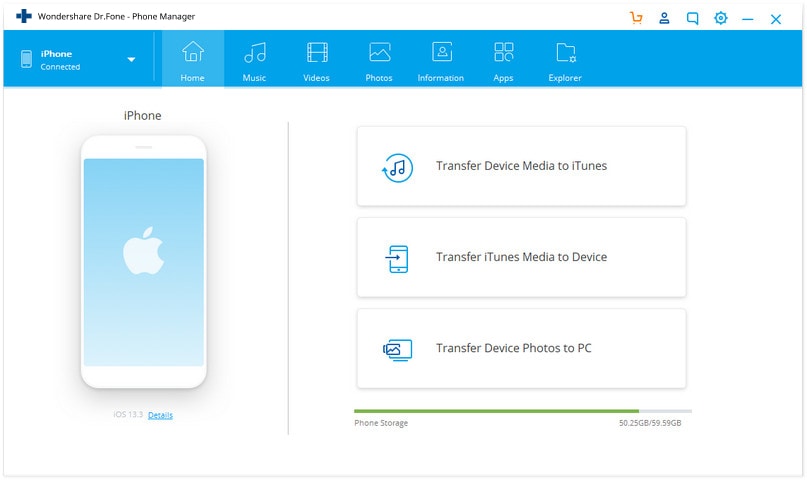
2. AdımGo to Music tab on DrFoneTool. Here you can manage and transfer all audio files, including music, podcast, etc.
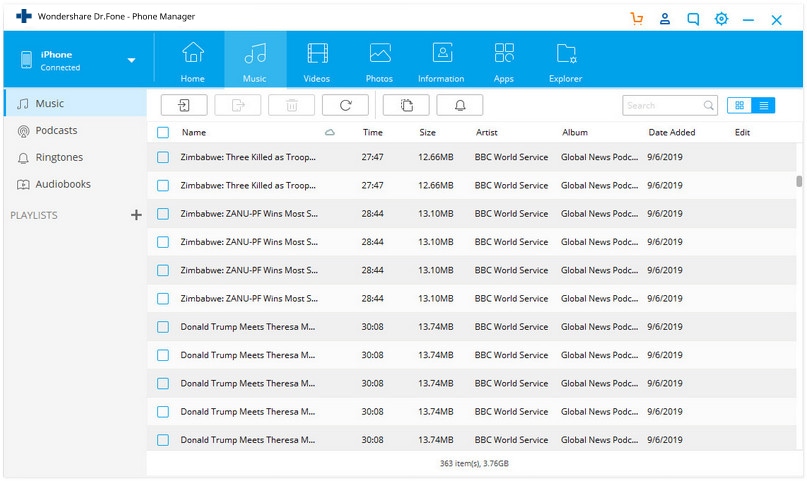
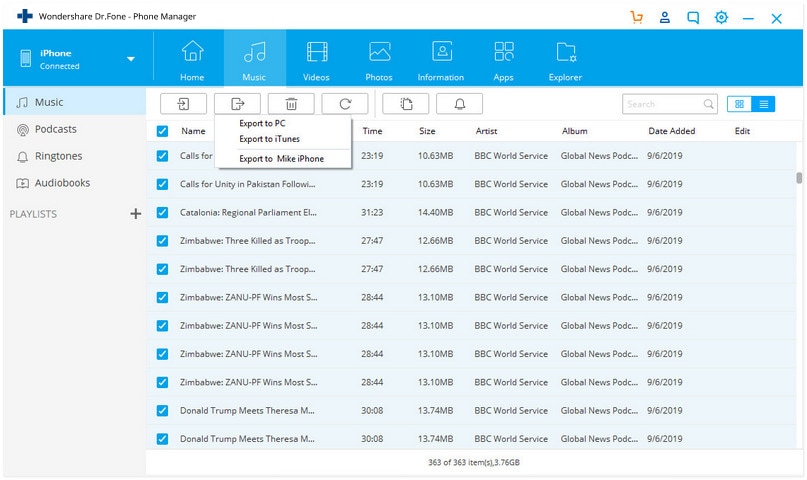
3. Adım Connect the Android phone to the computer at the same time. Then click Export button, and you will see the option Export to Device. It supports to export the music to target iPhone and Android devices.
Bonus Feature: Transfer Music from Device to iTunes with DrFoneTool – Phone Manager (iOS)
DrFoneTool – Phone Manager (iOS) still enables to transfer music from the iDevice/Android device to the iTunes. Simply go to Music, and select the music from your device and then click Dışa Aktar > iTunes’a Dışa Aktar.
En son makaleler

